Wednesday, December 29, 2010

50% off Sale!


'Tis the season of giving and we at Scrapbook Heaven would like to give you 

50% off

everything in The Store.  
From now until Friday, December 31st, 
please shop with coupon code Christmas .

Wishing you a joy-filled New Year!

Monday, December 20, 2010

Creative C.H.R.I.S.T.M.A.S.: S: Simple Sketch

Okay..this is it!

CHRISTMAS brought to you by the final letter 'S'....and even though it is the last it is packed full of possibilities!

I couldn't decide....so many 's' possibilities...so little time!

So...here is what I came up with....sketch, same supplies, scraps, simple, single photo, stash (use up some old!)....

Use the SKETCH, a SINGLE PHOTO, OR SAME SUPPLIES (on both a layout and a card, must show both if you do same supplies)....
Just have FUN AND SCRAP SOMETHING!

Here is the sketch...

Image

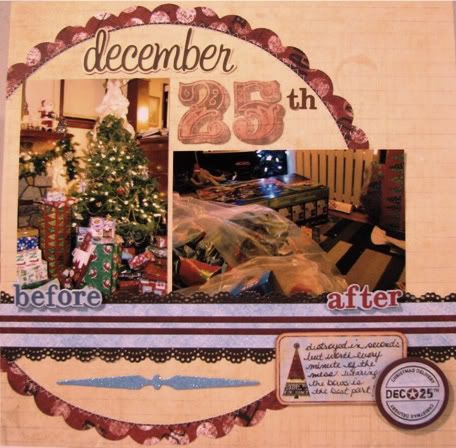
Here is the layout I did with that sketch where I used a single photo, kept it simple and used up some of my old stash (that snowman and snowflake I've had for a few years!)

Image

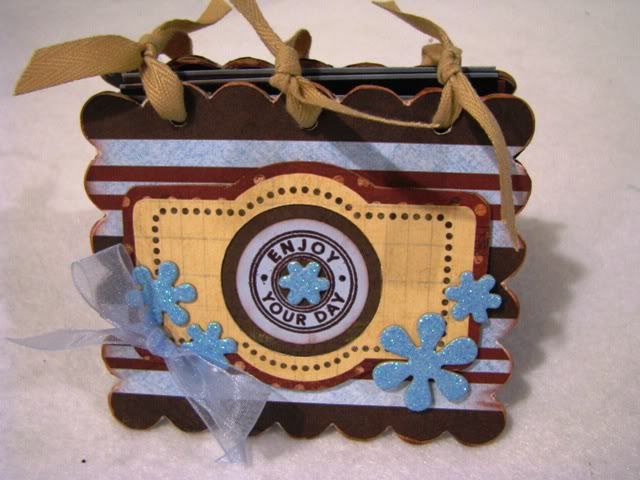
Then I didn't want to stop there.....I wanted to show how you could use the sketch to make a card....and of course I had to use the 'S'ame supplies which were also my 'S'craps!

Image

So...it is YOUR CHOICE! You can do a combo of them, you can do only one....

Here is the layout and card together!
Image

Friday, December 17, 2010

Creative C.H.R.I.S.T.M.A.S.: A: Advertisement Inspirations

During this time of the year, we are flooded from every which direction with advertisements. Ads can be a great source of inspiration. Designers and artists get paid the big bucks to come up with eye-catching layouts that we can then adapt for use on our scrapbook pages.

Here's an add that landed in my inbox from Anthropologie (my favorite store to visit):

Image

And here's my layout inspired by the ad:
Image

I loved the clean and simple design and the white background. I also loved the way the photos in the ad were cropped at slightly skewed angles. I also edited my photos to b&w with color on the focal points in each (this helped get rid of some of the distracting backgrounds in my pics, too).

For your challenge, create a LO inspired by an advertisement. Simple!

All projects are due at noon on December 22nd to be eligible for prizes.

Wednesday, December 15, 2010

Creative C.H.R.I.S.T.M.A.S.: M: Masking

My challenge today is all about the letter "M" -- for masking! Love this technique, especially when I can use my Smooch Spritz :-)

Image

I used some old Thickers (snowflakes) that I had -- they were silver in color, and not ones I normally would use, so..... I used them as a mask. Layed them on my card, and then spritzed with ink.

The pp I used was Joyride. Such a cute paper line! The chipboard piece was from the $$ store. I think this is one of my favorite cards I've done this Christmas.

So, your challenge is to use masking on a card.

All projects are due at noon on December 22nd to be eligible for prizes.

Monday, December 13, 2010

Creative C.H.R.I.S.T.M.A.S.: T: Tree

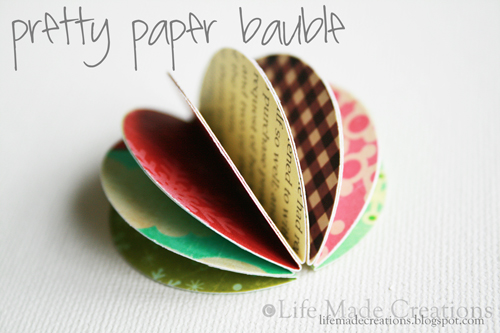
"OH Christmas Tree oh Christmas Tree"
Can you imagine a holiday crop without a "T"ree?? Me either. As much as I'd like to take credit for this one I can't. I'm not sure exactly where I saw this, but I will tell you the one I saw was all white and tall and skinny and beautiful. I hope you like it.

Image

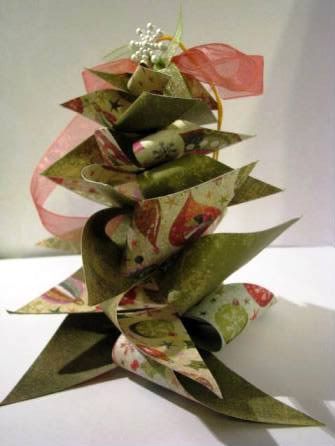
This could be used for a table display with some candy around it or as a hanging ornament.

Directions for PINWHEEL TREE

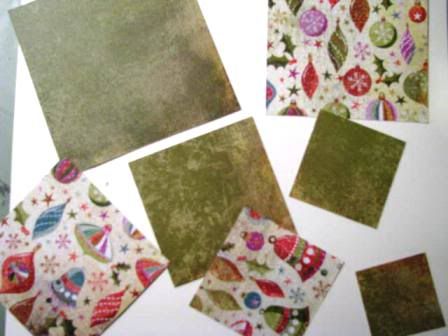
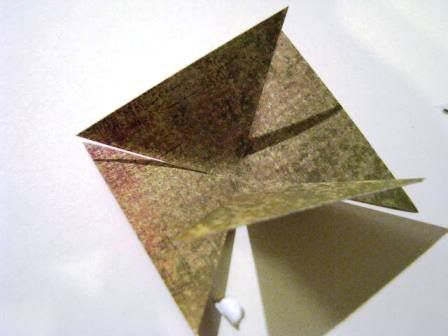
1. Cut as many "squares" as you desire (but a minimum of seven) out of double sided pp. I started with a 2" square. A little large for an ornament, perfect to place in a flat bowl with candy.
Image
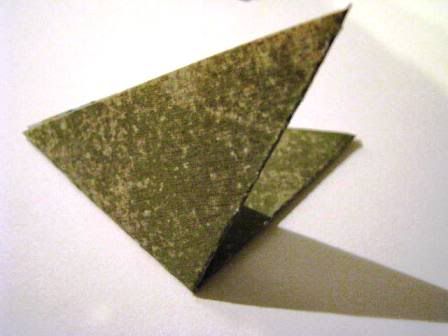
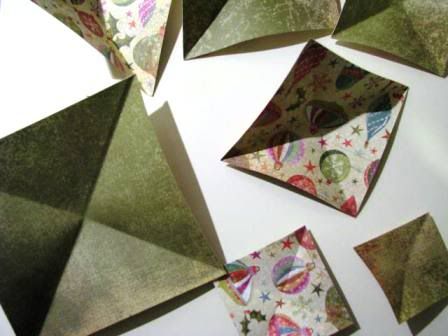
2. Fold squares in half and then half again. Cut each fold on fold line but NOT all the way to the center.
Image
Image
Image
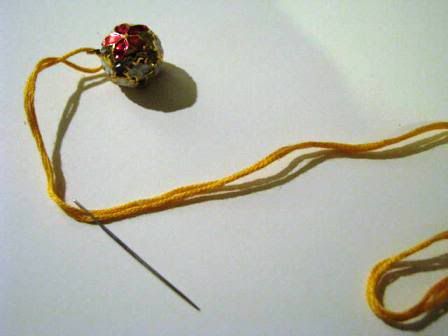
3. Cut a piece of embroidery thread about 12" long and place a bell on the thread. fold the thread in half and put both ends thru a needle.
Image
4. Add the largest pinwheel FIRST by piercing the needle thru the center of the pinwheel from the bottom. Put your needle thru each pinwheel section and continue to string your pinwheels onto your thread.
Image
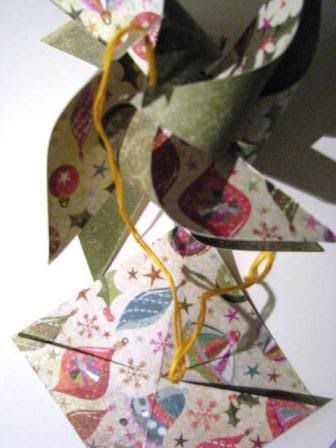
5. When you have all your pinwheels in place, you can knot your thread to secure the pinwheels, but keep the string on for hanging. Tie a knot at the end of your string.

Friday, December 10, 2010

Creative C.H.R.I.S.T.M.A.S.: S: Serendipity Shapes

For your challenge today, we're going back in time. If you have been scrapping for more than a few years, you probably remember serendipity squares. It's a very simple decoupage technique that adds a lot of texture to your project. We're going to revisit that technique with a bit of a twist. We're going to make "S"erendipity "S"hapes!

Image


To begin, gather "s"craps of "s"even coordinating papers. I used a fairly monochromatic assortment, but a mixture of colors could work, too, depending on the embellishment you are making. You also need a piece of chipboard, grunge paper, or very heavy cardstock. The size depends on how large your embellishemnt will be.

Image


Tear the scraps into small pieces. Mine were around one inch. Using Modge Podge or other adhesive, glue the scraps to the chipboard randomly, overlapping the edges. Allow to dry if you used a wet adhesive. At this point, I painted my piece with iridescent medium to give it a little shimmer. You could use Perfect Pearls, too, or just skip this step. Allow to dry. Next, I randomly stamped several swirl shapes on my piece and embossed with a white and glitter embossing powder. I totally forgot to take pictures during the process, but here is a picture of my leftover piece of "s"erendipity paper.

Image


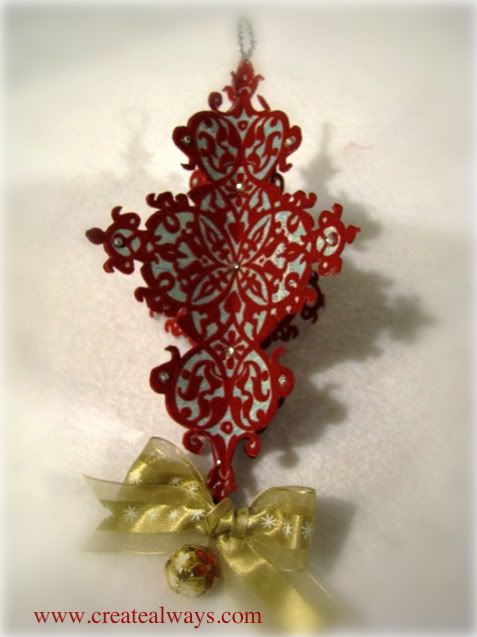
Now you simply cut your shape out of your paper and embellish as desired. I am absolutely terrible at drawing, so to make the pattern for my tree, I scanned an actual stamp and then enlarged it to the size I wanted! I cut my tree apart and then randomly traced the pieces on the back of my "s"erendipity paper. Cut out, reassemble, and embellish!

Image

Image


Have fun! For a few more "S" challenges, how about "s"ewing on your layout or using a "s"wirl? And then make a card from your "s"craps!

All projects are due at noon on December 22nd to be eligible for prizes.

Wednesday, December 8, 2010

Creative C.H.R.I.S.T.M.A.S.: I: Ink

Wooohooo....C.H.R.I.S.T.M.A.S. brought to you by the letter 'I'!

Okay....wanted to find something different to do with the ol' inks, but yet at the same time super easy and I think I found it! WE WANT YOU TO USE SOME INK! At least 2 different colors...some way!

First...here is 2 projects I've done with this technique so far....

Image

Close up....
Image

Image

Close up (not as good as I'd like)
Image

I pulled out my Tim Holtz inks but any will do for this!!!

First, stamp your image (I stamped the birdhouse and the lamp FIRST). Then with your glossy accents (or any other product that will dry clear!) cover your image. It doesn't have to be 'perfect'. Thump out any 'bubbles' if you have any and then let it dry.

After it has dried pull out your other inks and play away. The glossy accents has created a 'resist'! I played and just created different 'smudges' with my inks. On the tag I added some rubons and inked right over those also! For the card I actually inked with lighter colors for the background and then found the background stamp with the words and stamped right on top of it all. I did use a wipe to wipe off any ink that got on the resist. I LOVE the effect this created!

For this challenge you do NOT have to do the technique but I do want you to use AT LEAST TWO (2) DIFFERENT color inks on your project! and HAVE FUN!

All projects are due at noon on December 22nd to be eligible for prizes.

Monday, December 6, 2010

Creative C.H.R.I.S.T.M.A.S: R: gaRland & Ribbon

I have wanted to make a garland to decorate my home for a while now, and what better time to decorate than the holiday season! Today's challenge for letter "R" is to make a g-AR-land to deck the halls of your home. And of course, what's a garland without some RIBBON, so be sure to tie one (or two!) on (it is the holidays after all!)

Here's a look at the one I made to hang in the empty space above our mantel:

Image


And here's a little how-to on creating the paper baubles:
You can use more or less, but 7 seemed like a lucky little number 

 Easy enough; nothing special here.

Adhere all those mini paper tacos together being sure the folded edges are flush.

 Isn't that so pretty?!  Leaving the last edge unglued makes it easy to sandwich the thread in the center without actually having to thread it.
Then gather up all the supplies you want to include in your garland (and then some).  
I ended up not using the little snowflakes, and added in some crystal beads.
The letters to spell "Merry Christmas" were done up easily on the computer then layered on a circle, scallop circle, and jumbo snowflake punched from a grocery bag.
I used some thin twine for the base and began by threading all the crystal beads on.  Then it was easy enough to adhere the snowflake letters and paper baubles in place, and tie on some ribbon scraps. 

All projects are due at noon on December 22nd to be eligible for prizes.

Friday, December 3, 2010

Creative C.H.R.I.S.T.M.A.S.: H: Handful and Hidden Journaling

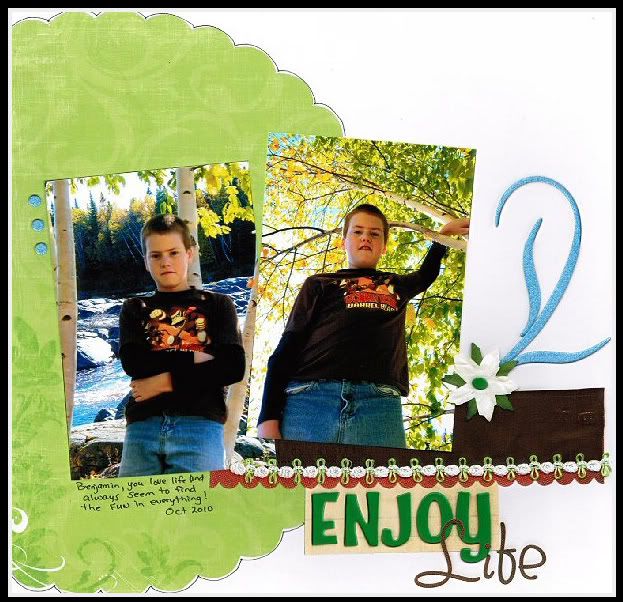
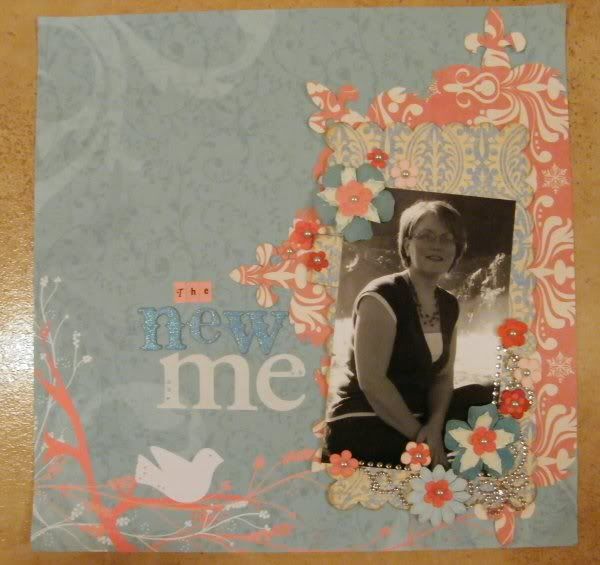
Today's challenge is brought to you by the letter H :-)

Scrap a layout using either a HANDFUL of some embellishment (at least 20) or HIDDEN JOURNALING.

Here's my example. I used some of the December Elite kit -- just added some extra flowers and bling.
Image

Here's my hidden journaling tag:
Image

Thursday, December 2, 2010

December's GDT

With the turn of the calendar page, we say goodbye to Heather as our November Guest Designer.  Heather, you did an amazing job helping is with our card crop last month.  You have a style all your own and always inspiring.  Thanks so much for sharing your talents with us!

And now we give a happy hello to Dana Phillips.  Dana has been a member of Scrapbook Heaven for well over a year.  Despite her busy life as a homeschooling mom, she still finds time to inspire us with her creations.  Welcome to the team, Dana!

Hi, I'm Dana and I'm excited to be the GDT this month!


I am a chemist turned SAHM. I really loved my job, but we felt it was important for me to be home with the kids. David and I have been married 17 years and we homeschool our two children, Danae (10) and Dawson (8). We currently live in Mississippi, but I have lived all over the US and spent most of my childhood in Belize.


I've been scrapping since the end of 2000 when I completed about 75 layouts in a little over a month. Crazy, I know! But when the bug bit, it bit hard. Needless to say, I'm not nearly that productive now that my style is a little more refined. I am definitely a clean and simple scrapper and I make as many double page layouts as single pagers. A few years ago, I discovered card making and I love making a card or two from the leftovers of a layout. Although I don't have as much time to devote to this wonderful hobby as I would like, I think I will be scrapping for the rest of my life.

Wednesday, December 1, 2010

Creative CHRISTMAS: C: Candy, Color, Cardstock and Cards.

I'm excited to start of The Creative C.H.R.I.S.T.M.A.S. with ALL of you. And what a better way to start of the holidays than with
Candy, Color, Cardstock and Cards.

For my challenge you will need to make a card using bright colors, cardstock and this sleigh, if you can add candy in there all the better.

Here is a printable pattern for you to use of the sleigh.

Have fun with this, as you can see I've given you some examples to work from, but I'd love to see what you can come up with.

Image

I used metal, sewing, embossing for these cards.

December Kit Reveals

This month's Elite kit is packed with goodies to adorn your holiday party, traditions, and winter activity layouts.  Have a look at what the design team created with this fabulous kit:

 Carla's Reveal:
Image

Image

 Lee's Reveal:
Image

Image

Image

Image

Image

Image

Image