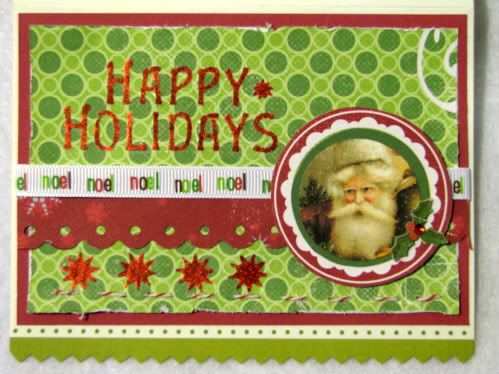
Wow! That's about the only word that I can find to describe the creations that were uploaded from this month's card crop. Wow! Well, with so much fantastic inspiration over in the gallery I managed to narrow it down to one pick for this week's From the Gallery, and it's this cutie from new member ChrisP:
Tuesday, November 30, 2010
From the Gallery 11.30.10
Posted by Unknown at 8:30 AM 1 comments
Labels: from the gallery
Monday, November 29, 2010
The Creative C.H.R.I.S.T.M.A.S Event
The Scrapbook Heaven Design Team will be posting card, layout and project challenges every other day in the forum, starting on December 1st. and continuing until December 20th. Join us for this fun holiday event as we will be serving up C.H.R.I.S.T.M.A.S. creations like you've never seen before! All challenges will be due December 23rd and a winner will be announced December 24th. You don't want to miss this CREATIVE holiday event!
Where: The Forum
When: Dec. 1st, 2010 - Dec. 20th, 2010
Where: The Forum
When: Dec. 1st, 2010 - Dec. 20th, 2010
Posted by Unknown at 9:21 PM 0 comments
Labels: online crop
Saturday, November 20, 2010
Card Crop Batch #5
Carla's 5th Card:
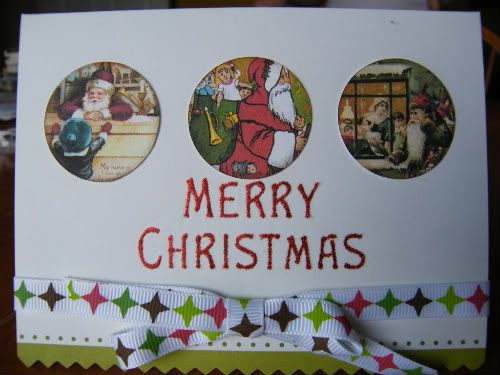
Another easy card
I tied a strip of ribbon into a bow. Added the images and a rub-on sentiment.
Jules' 5th Card:
Put it in a pocket!

This is sooo easy!
Card base is a standard 5.5 x 4.25..
Cut the bottom of the 'pocket' to create the pointed shape. Cut off about 1/2 inch from the top of card to create the look of something being 'in' the pocket.
Cover base with patterned paper. With pen create the 'stitched' look around the pocket.
From coordinating patterned paper cut out hearts. Assemble 'cluster' with hearts, bow and mini tag.
Cut a piece of scrap paper cut a piece 1 x 3.75. Adhere inside front of pocket. Embellish with coordinating lace.
Lee's 5th Card:
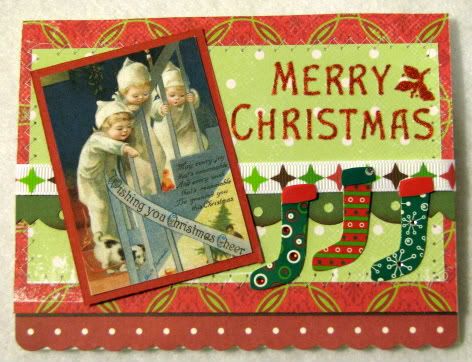
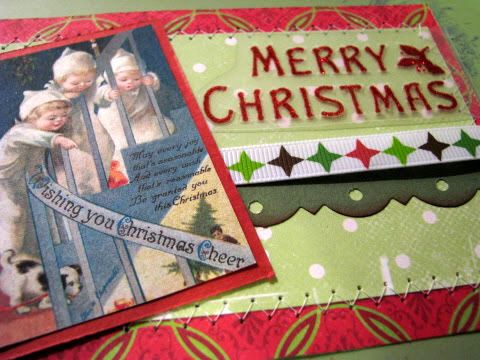
Instructions
1. Cut a piece of patterned paper 5 1/2" X 3 1/2".
2. Cut another piece of patterned paper 3" X 5".
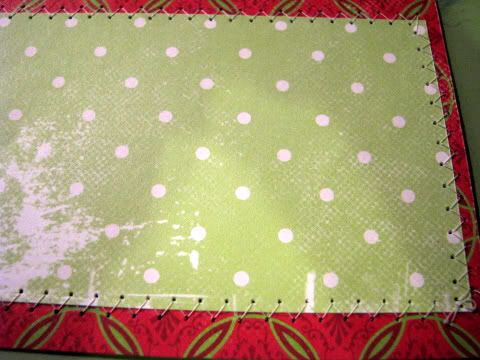
3. Mount the patterned pieces together. Sew edges if desired.
4. Cut a piece of coordination cardstock 1' wide and cut a scallop edge out of this cardstock border.
5. Attach the border to the center of your card. Attach ribbon to the top edge of the scalloped edge.
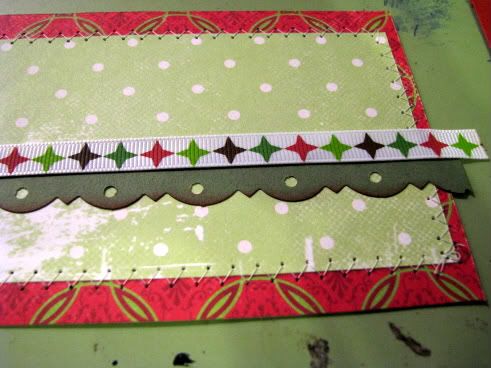
6. Attach matted papers to your card front.
7. Mount an oblong holiday image to a piece of cardstock and attach to the right hand side of your card.
8. Add rub-on word sayings and embellishments.
Michelle's 5th Card:
I'm going easy on you for this last one! It's a simple pocket card made from 12" long paper. The extra inch folds up to create a little pocket inside the card. Use it for cash, a gift card, a packet of soup, cocoa, or tea bag.

1) Cut a strip of paper 4 1/4" x 12" long.
2) Fold and score at 5 1/2" and 11". Fold 1" piece up and glue edges to inside of card to create a basic pocket.
3)Decorate card front as desired. I fussy cut some patterned paper, folded some paper flowers, and stamped sentiment on a transparent scrap from a sheet of stickers.
All projects are due on Saturday, November 27th, 9PM cst.
***PLEASE NOTE***
You don't have to copy the card tutorials as outlined. Please feel free to use what you have available at home to make a card using the ideas shown in each tutorial.

1) Cut a strip of paper 4 1/4" x 12" long.
2) Fold and score at 5 1/2" and 11". Fold 1" piece up and glue edges to inside of card to create a basic pocket.
3)Decorate card front as desired. I fussy cut some patterned paper, folded some paper flowers, and stamped sentiment on a transparent scrap from a sheet of stickers.
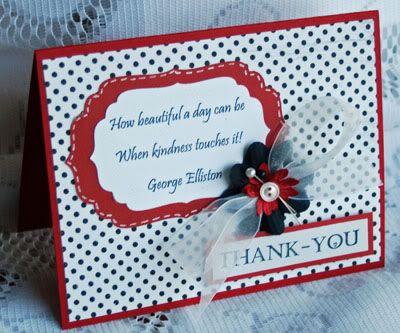
GDT Heather's Sketch:
Here's my second sketch and example



All projects are due on Saturday, November 27th, 9PM cst.
***PLEASE NOTE***
You don't have to copy the card tutorials as outlined. Please feel free to use what you have available at home to make a card using the ideas shown in each tutorial.
Posted by Unknown at 9:00 PM 0 comments
Labels: Card Crop
Card Crop Batch #4
Carla's 4th Card:
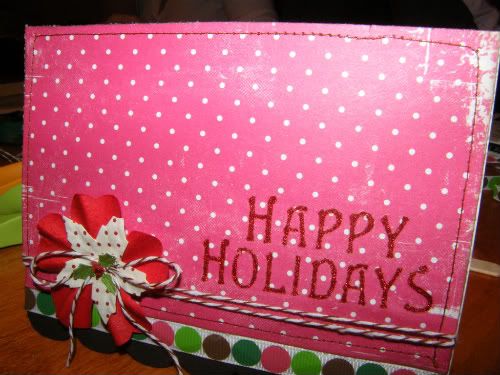
For this card, I used one the card bases that came with the kit. It measures 5 1/2 x 4 1/2.
I cut a piece of the red pp 3 1/2 x 5 1/2. I stitched it around on my sewing machine. I used the baker's twine and did a couple loops around the red pp. Then, adhered to my card base. Just below the red pp, I added a strip of ribbon.
Finished this one off with a rub-on sentiment and a layered flower.
Jules' 4th Card:
Fold it over...stand it up!

Inside...

The base for this one is 5.5 x 10.75. Finished card is still 4.25 x 5.5.
Score cardstock at 4" from one end and 2.5 from the other. Fold in leaving shorter end for the outside of card. (see picture!)
Using coordinating patterned paper and scrap coordinating cardstock place paper on card base. For some added texture I dry embossed the solid cardstock.
I used a spellbinder to cut the 'oval' on the front of the card but you could use anything! I've seen these done with circles, squares...etc. Add a brad to the inside so the card will 'catch' and stand! Add sentiments as you like!
Lee's 4th Card:

Instructions
1. Fold and 8 1/2" X 11' piece of cardstock in half.
2. Using a circle template (or cutting system) cut a circle about 5" in diameter, DO NOT CUT THE TOP FOLD OF YOUR CARD.
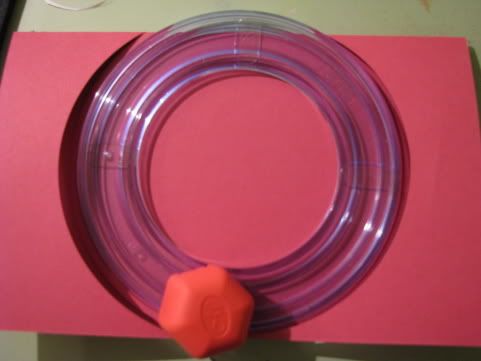
3. Cut another circle out of cardstock 1/4' smaller than the card you made in step 2.
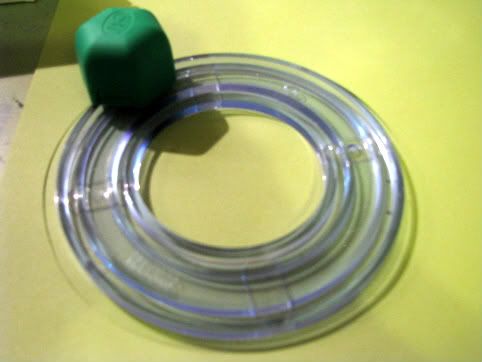
4. Cut another circle from patterned paper 1/4" smaller than the circle you cut in step 3.
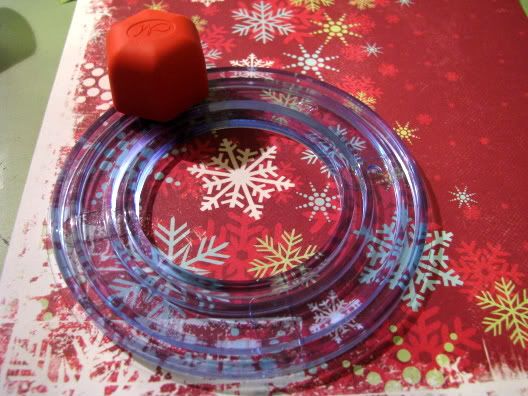
5. Cut the top edge of both the patterned paper and cardstock so that they will both have about a 1/4' edge.
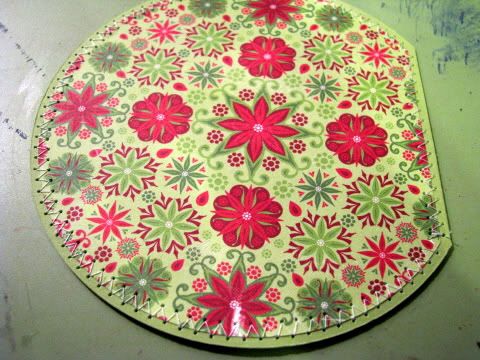
6. Sew patterned paper and cardstock together if desired.
7. Attach ribbon the the left edge of your patterned paper mat.
8. Attach flowers to ribbon.
9. Make leaves for your flower by tracing a leaf image onto patterned paper. Cut out.
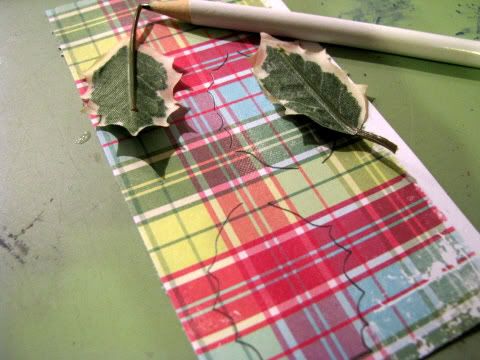
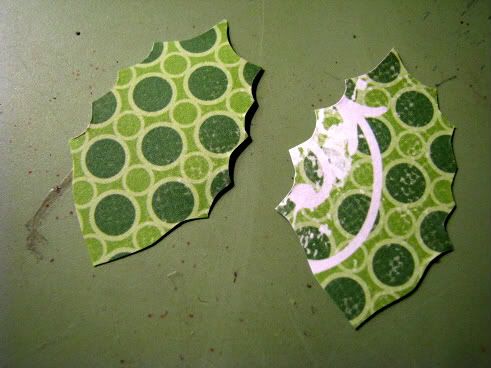
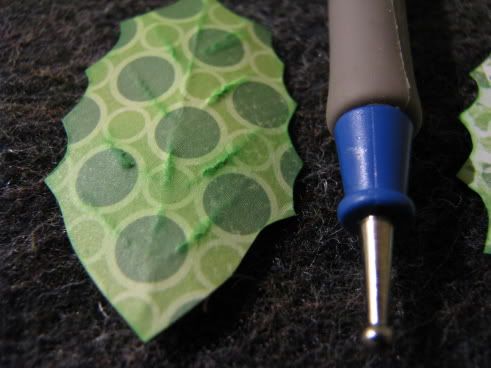
10. Emboss the leaf and ink edges. Attach behind flower.
11. Attach a rub-on to a piece of patterned paper.
12. Cut around word saying rub-on.
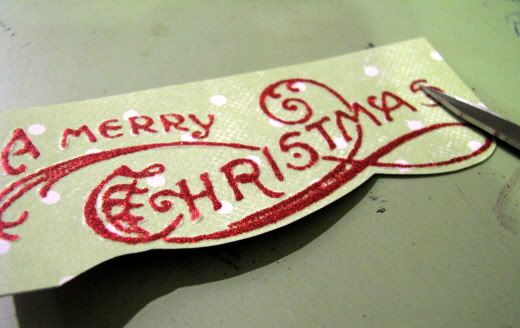
13. Mount the word saying onto cardstock and cut out again.
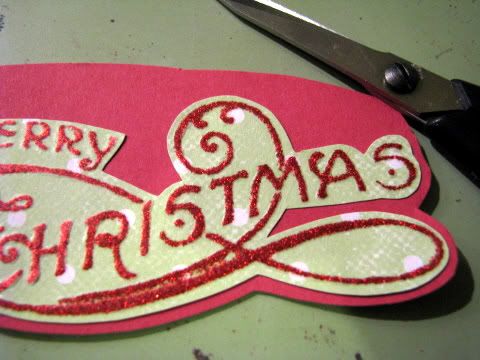
Attach word saying to card front, bottom edge. Apply bling (not included).
14. Attach matted circle to card front.
Michelle's 4th Card:
This cute little card whips up quickly, and the inside has plenty of room for a photo and a greeting.

1) Cut cardstock base 10 1/2" x 3 1/2"
2) Score at 3 1/2" and 7" and on the diagonals as shown:

3) Cut patterned paper 3 1/4" square and along diagonal.
4) Fold and adhere triangles from step 3 as shown:

5) Embellish as desired. Use ribbon to tie closed, or use a decorative clip as I did in my sample.
All projects are due on Saturday, November 27th, 9PM cst.
***PLEASE NOTE***
You don't have to copy the card tutorials as outlined. Please feel free to use what you have available at home to make a card using the ideas shown in each tutorial.

1) Cut cardstock base 10 1/2" x 3 1/2"
2) Score at 3 1/2" and 7" and on the diagonals as shown:

3) Cut patterned paper 3 1/4" square and along diagonal.
4) Fold and adhere triangles from step 3 as shown:

5) Embellish as desired. Use ribbon to tie closed, or use a decorative clip as I did in my sample.
All projects are due on Saturday, November 27th, 9PM cst.
***PLEASE NOTE***
You don't have to copy the card tutorials as outlined. Please feel free to use what you have available at home to make a card using the ideas shown in each tutorial.
Posted by Unknown at 6:00 PM 0 comments
Labels: Card Crop
Card Crop Batch #3
Carla's 3rd Card:

This card is 5x7.
Pretty simple card that is easy to make. The pp is 6 3/4 x 4 3/4.
Embellishments are the rectangle image and a couple of flowers. I added 2 leaves under the flowers and put some stickles around the edges. Three little beads finished off the flower.
The rub-on sentiments that came with this kit are excellent for cards!
Jules' 3rd Card:
Keeping it simple.....


Layers...I like layers!
I used one of the bases that were in the kit for the card base!
Cut strip of black cardstock 2x 5.5, red patterned paper 1.75 x 5.25, white cardstock 1.5 x 3.75, 3 1.25 x 1.25 squares from black cardstock and 3 1x1 squares from coordinating patterned paper.
Ink edges, assemble as shown, use pop dots for 3 small squares to add dimension. Stamp sentiment, add bow with ribbon from kit!
Lee's 3rd Card:

Instructions
1. Cut a piece of patterned paper 5 1/2" X 3 1/2".
2. Lightly tac down the patterned paper to the card face and punch a circle in the bottom right hand corner of the card and patterned paper at the same time.
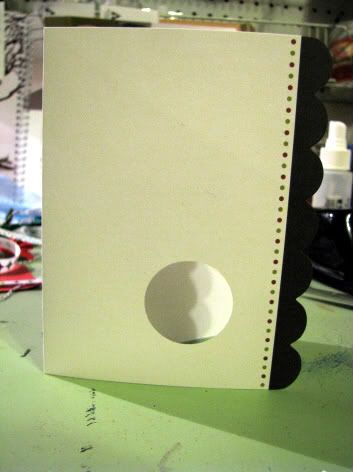
3. Remove patterned paper and attach a ribbon to the left edge of the patterned paper.
4. Attach patterned paper to your card.
5. Cut a circle from circle patterned paper and punch a hole directly in the middle of the circle. Attach the cut out circle to the punched our circle on the card.
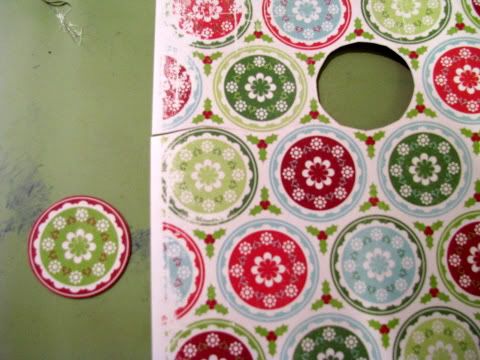
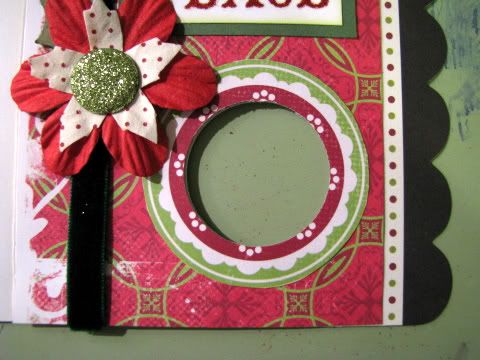
6. Cut a Santa circle and mount on cardstock circle. Place behind the cut out circle card front.
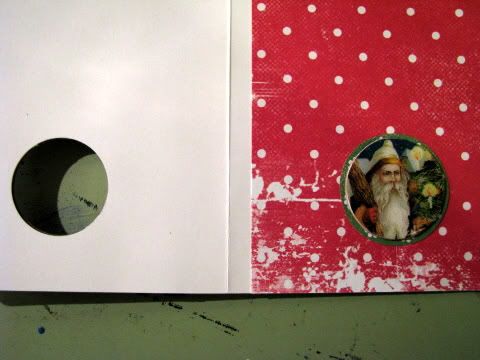
7. Add flowers.
8. Add a word rub-on to white cardstock, ink edges and mount to a coordinating piece of cardstock. Attach to card front.
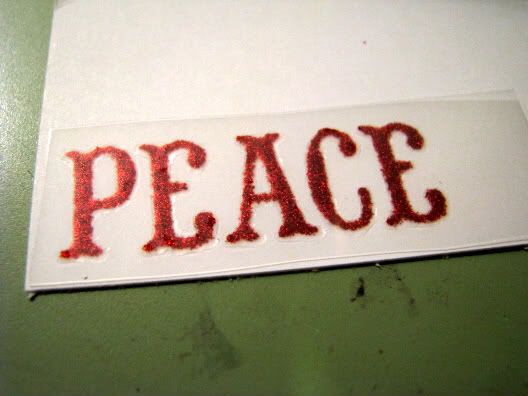
9. Attach matted patterned papers to card front.
Pump it UP!
1. Add glossy accents to the Santa circle.
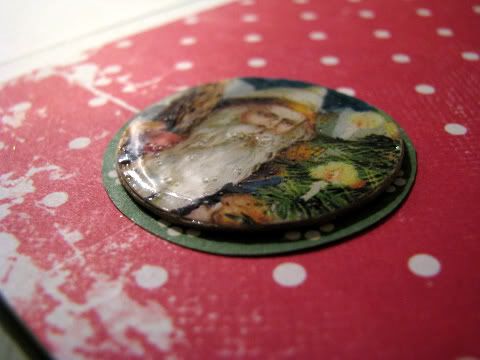
Michelle's 3rd Card:
This little card is an oldie but goodie. Used this style for my youngest's birth announcement 5 years ago. They whip up faster than you think and pack an impressive punch!

1) Cut cardstock base: 4 1/4" x 5 1/2"
2) Cut patterned mat: 4" x 5 1/4" and adhere to base
3) Cut holder strip 1" x 4 1/4". Do not adhere, attach with eyelets, brads, staples at top and bottom.
4) Cut pull tab piece: 8 1/2" x 1 3/4" and score at: 4 3/4", 5 3/4", 6 3/4"

5) Cut 3 squares for accents: 2" and mat with 2 1/4"
6) Place adhesive on the boxes created by the scores in step 4 and apply the accent blocks by lining up the left side of the square with the fold on the pull tab.

7) Feed the back of the accented tab piece under the holder strip and adhere the larger of the three scored blocks to the top of the holder strip to secure.

8.) Embellish and add a ribbon or tab to the pull strip.
All projects are due on Saturday, November 27th, 9PM cst.
***PLEASE NOTE***
You don't have to copy the card tutorials as outlined. Please feel free to use what you have available at home to make a card using the ideas shown in each tutorial.

1) Cut cardstock base: 4 1/4" x 5 1/2"
2) Cut patterned mat: 4" x 5 1/4" and adhere to base
3) Cut holder strip 1" x 4 1/4". Do not adhere, attach with eyelets, brads, staples at top and bottom.
4) Cut pull tab piece: 8 1/2" x 1 3/4" and score at: 4 3/4", 5 3/4", 6 3/4"

5) Cut 3 squares for accents: 2" and mat with 2 1/4"
6) Place adhesive on the boxes created by the scores in step 4 and apply the accent blocks by lining up the left side of the square with the fold on the pull tab.

7) Feed the back of the accented tab piece under the holder strip and adhere the larger of the three scored blocks to the top of the holder strip to secure.

8.) Embellish and add a ribbon or tab to the pull strip.
All projects are due on Saturday, November 27th, 9PM cst.
***PLEASE NOTE***
You don't have to copy the card tutorials as outlined. Please feel free to use what you have available at home to make a card using the ideas shown in each tutorial.
Posted by Unknown at 3:00 PM 0 comments
Labels: Card Crop
Card Crop Batch #2
Carla's 2nd Card:
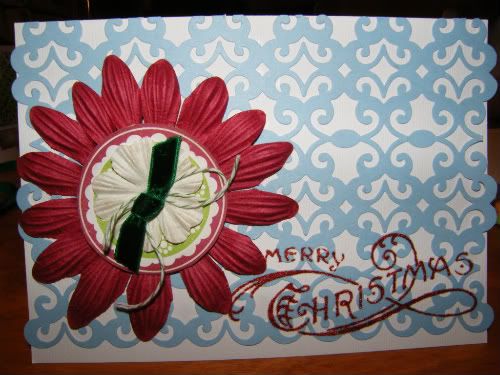
Here is another card using the lace pp. I think the blue is avery pretty Christmas color
Again, it's on a 5x7 card base. I trimmed the lace pp to fit. It does overlap a small bit on both side edges.
Added the big flower and layered it with a cut out from the circle patterned paper, a plain flower, a ribbon knot and a baker's twine bow. Lots of layers!
I added a rub-on sentiment.
Jules' 2nd Card:
Punch it up and make it work!

This was so fun!
Card is 4.25 x 5.5
Cut the base from double sided patterned paper.
Fold over and cut an 'arch' to create place to add flower.
With coordinating patterned paper use a flower punch. Punch 2 of same flower, 'curl' flower edges by pressing on each petal.
With green scrap cardstock cut stem and leaf, dry emboss leaf to create the look of a leaf. Adhere green stem to edge of card, top with flower, use brad to keep flower in place.
Embellish with bling and use rubon for card sentiment.
Lee's 2nd Card:
Instructions:
1. Cut a piece of cardstock that measures 5 2/8" X 3 5/8".
2. Cut a piece of patterned paper that measures 3 3/8" x 5". Distress the edges of the patterned paper.
3. Punch a border strip with curvy punch appox. 1 inch wide.
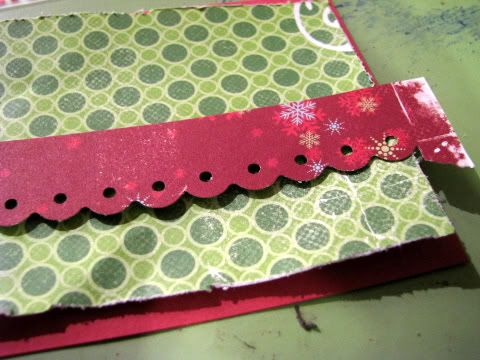
4. Attach the patterned paper to the cardstock and then the border to the middle of the mat you just made.
5. Attach ribbon to the top edge of the curved border and adhere your card front to the face of your card.
6. Cut out a Santa image and mount it to a "circle" cut out of coordinating cardstock.
7. Cut a circle from the patterned paper supplied. Mount the circle image in step 6 to a patterned paper circle. And attach to your card. Embellish.
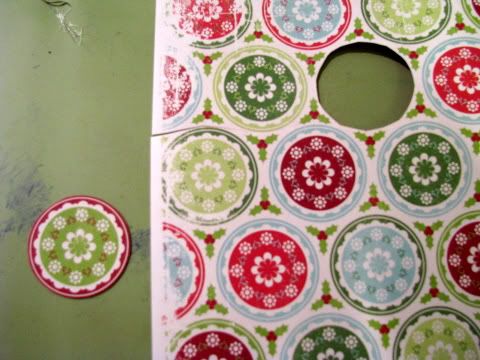
8. Apply rub-on word sayings.
Pump it up!
1. Mount the patterned paper circle to chipboard.
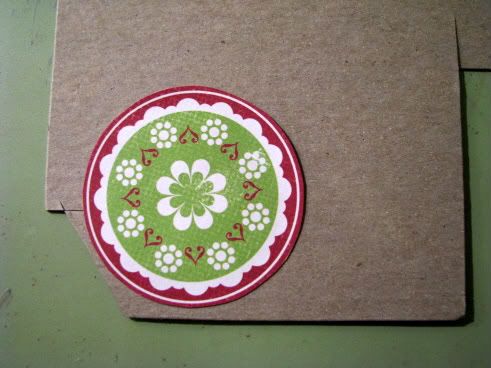
2. Glossy accent the santa image.
3. Sew a border of thread along bottom of card.
Michelle's 2nd Card:
I found the idea for this card online and just fell in love with it. I'll warn you, it took me two tries to get this one right, so you may want to test it out on scrap paper first. (But, then, you all probly have more smarts than me and will get it on the first try!)

1) Cut a piece of cardstock to 8 1/2" x 5 1/2"
2) Score across at 4 1/4" (like you would for a traditional card)
3) Holding paper vertically, make a cut 2" from left side starting at 2 1/8" from top and running until 1" from bottom.
4) Score from right side to cut made in step 3, working from bottom up at: 1", 2", 3 1/8", (4 1/4" score is already there from step 1) and 6 3/8".
5) Fold the 2" wide left fold as a mountain, the 3 1/2" portion at the 4 1/4" as a valley. Alternate remaining scores as mountain and valley to create the "stairs".

6) Take a deep breath because you made it through the hard part and have fun embellishing your card!
All projects are due on Saturday, November 27th, 9PM cst.
***PLEASE NOTE***
You don't have to copy the card tutorials as outlined. Please feel free to use what you have available at home to make a card using the ideas shown in each tutorial.
***PLEASE NOTE***
You don't have to copy the card tutorials as outlined. Please feel free to use what you have available at home to make a card using the ideas shown in each tutorial.
Posted by Unknown at 12:01 PM 0 comments
Labels: Card Crop
Subscribe to:
Comments (Atom)


